I hope you are all doing well at this crazy time. I’ve been thinking about you, I hope you’re staying home and healthy! This month I’m offering weekly freebies and along with it, I’m offering a sew along with you on my Instagram stories so we can all do something together. Think sewing night with the girls. It’ll be great. follow me @britt.stitch on Instagram for those sew alongs. They will be saved in my highlight bubbles as well.
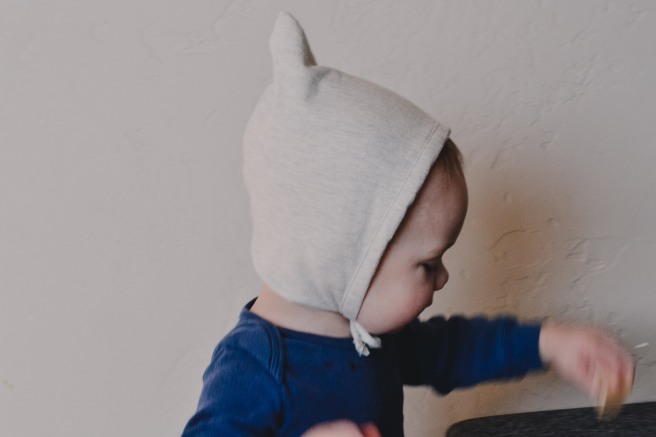
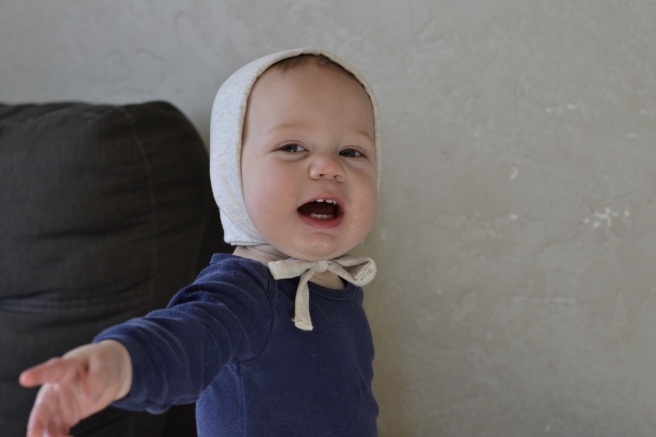
This week we will sew up the hood bonnet pattern. This is such a fun quick sew and a perfect little hat for spring or fall. Not too heavy or hot. I hope you love it! Tag #covidfreesew or my instagram handle @britt.stitch so I can see your bonnets! It means the world to me.
Download the pattern
(no longer available for free on this post. thank you for your interest! it is still available in the shop.)
We are stuck indoors. And I’m sure we are either in one of two boats. 1. Quarantined, clean house, binging netflix and ice cream, and lots of time on our hands. 2. Quarantined, schooling multiple children, house a mess, no time to breath or think.
I’m finding myself in boat numero 2. It’s fine. We are all fine. My house looks like a tornado hit it and it’s fine. But sometimes I still need some me time, and that’s where this blessed list comes in. And if you’re in boat 1. You can make the whole list! 😉
Before I start, I’m reminding you that I am offering freebies this month with sew alongs on my instagram page. Find me @britt.stitch
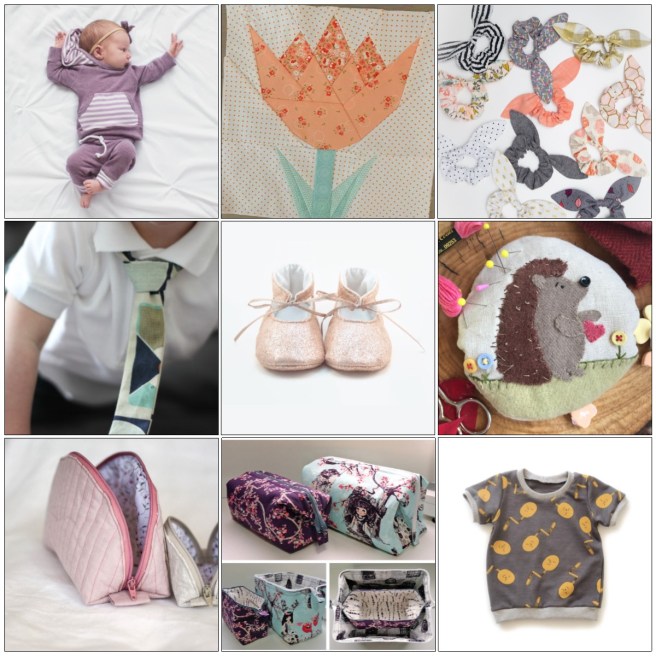
I shared some of my favorite accounts on my instagram and I’ll share them here too:
Lowland Kids raglan hoodie this is literally my favorite freebie on the www. I’ve made it for all my kids and they all love it. It’s super quick too.
One Last Stitch. I’m so amazed by Rachel & Judy’s creativity. Quilting is truly an art. She’s offering this cute quilt block for free. Wouldn’t this be the prettiest spring quilt?
Sew Much Ado I’m living in scrunchies right now. So I’m definitely making myself some of these. She also has mini scrunchies perfect for Easter baskets and many other darling freebies.
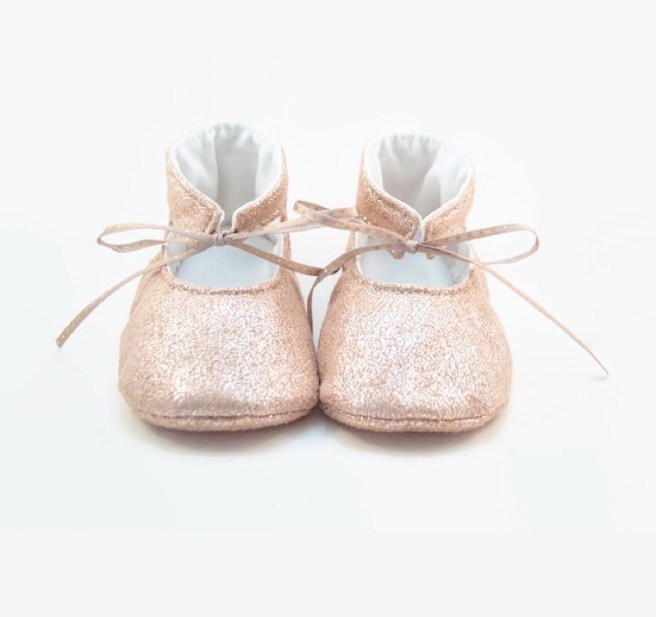
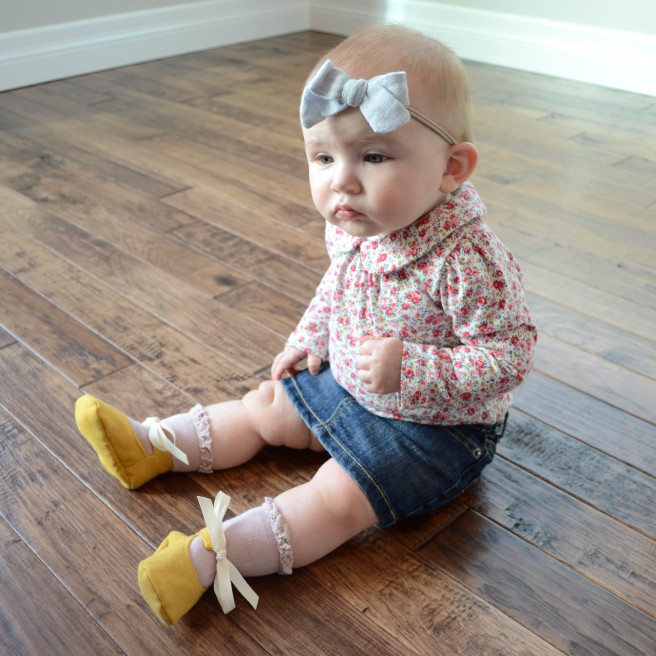
My Ribbon Tie Mary Janes are available for free for a few more days! But don’t worry I will be offering more freebies here so check back. The sew along is on my instagram if you missed it!
Sewing Masin’s Pipa the pouch is perfect for me and all the girls in my life. Girls need bags- it’s science. I recently found Masin and I think this new pattern designer is just lovely. I love her style and I can’t wait to see what she comes up with next.
Speaking of bags Emmaline Bags the retreat bag is free and beautiful. I just bought some of her internal wire frames off amazon prime! yes ma’am I love two-day shipping. I’ll be making myself one of these pronto.
Brindille and Twig’s Ringer Tee is darling, along with the rest of her patterns. Love this pattern maker. Aren’t knit patterns for kids the best?
I hope you are all doing well at this crazy time. I’ve been thinking about you, I know it’s scary, healthwise, and financially for many. I’m trying to do my bit by staying home and checking in on my family and neighbors. But I wanted to offer something for you too! I don’t have pages of patterns but what I do have I want to offer for free. Along with it I want to sew along with you on my instagram stories so we can all do something together. Think sewing night with the girls. It’ll be great. follow me @britt.stitch on instagram for those sew alongs.
We will start with the Mary Jane Ribbon Tie shoe. This pattern includes two versions. Pattern A has an elastic back and Pattern B does not. After making this shoe about 100 times I will tell you to MAKE PATTERN B (pattern B instructions start on page 7). Don’t even bother with the elastic back version. I’ve literally used it once since I created it because with the ribbon tie you don’t really need the elastic (unless you’re really worried about tying it too tight or you want to tie it once glue it or sew it shut and use the elastic to get it on and off. So I guess it’s there if you see a use for it.)
Alright without further ado. Here we go welcome to the Mary Jane Ribbon pattern.
click below for link and print away:
Download Pattern Here
(update: pattern no longer available for free thank you for all your interest! it is still available in the shop 🙂 )
Do you want to learn how to make your own patterns and make clothes that fit you just how you want? You’re in the right place.
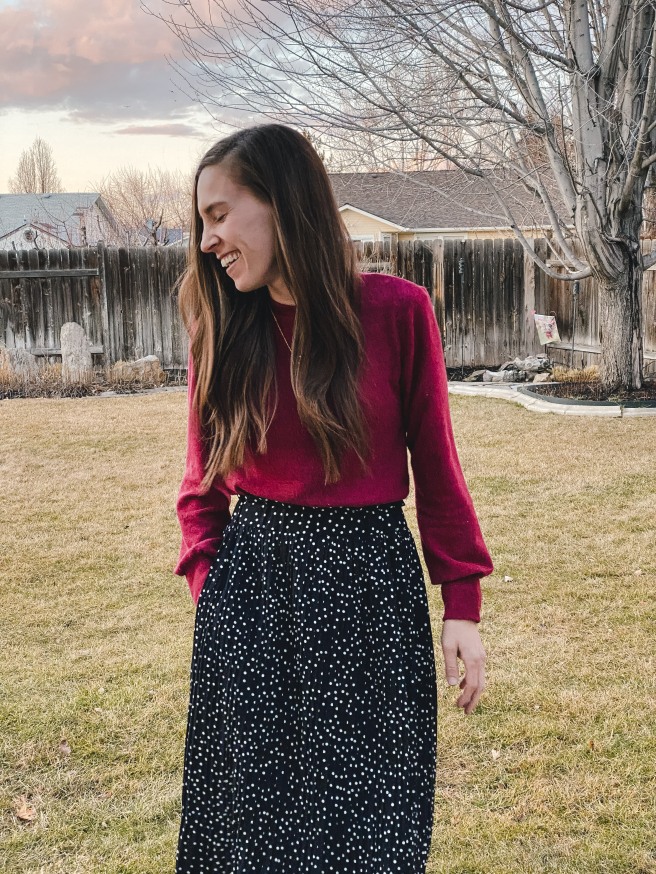
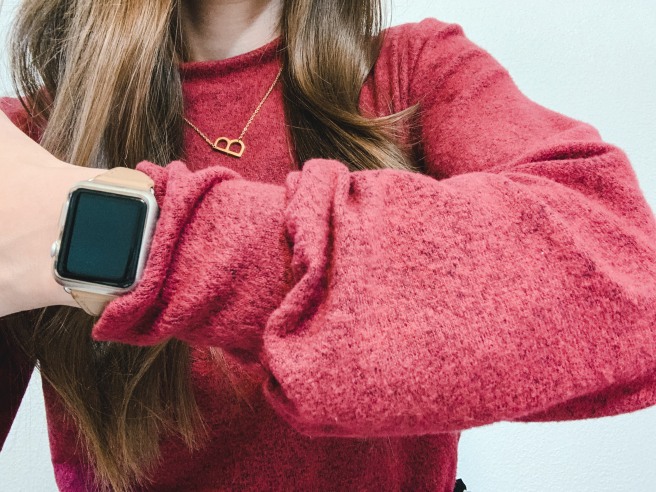
I recently made this top and showed the process on my instagram stories. (@britt.stitch) It’s saved in a highlight bubble if you’re interested in seeing the whole process. It won’t be as thorough here.
Making your own pattern from clothing you own is a pretty simple concept and just takes a little practice to get it right. The basic idea is to follow the outline of your clothing adding room for a seam allowance. And adding or subtracting to make it fit how you want of course!
This time around I’m using a knit jersey with a 4-way stretch. It’s perfect for a first timer because this will be very forgiving if you don’t get measurements just right. Let’s get into it.
STEP 1: the first thing I need is clothes from my closet. My inspiration for this top is a loose-fitting shirt with baggy sleeves and a longer wrist cuff. I decided I wanted the neckline to fit like a t-shirt style right up to my neck but not a mock neck. So today I found in my closet a t-shirt that fits me well and has the neckline I want and the body is a good fit so I’ll use that too. My sleeve at the shoulder is also going to fit just like this t-shirt (no gathering at the top of the sleeve) except I’ll be making it long and baggy so I can also use the sleeve opening from this shirt as my pattern.
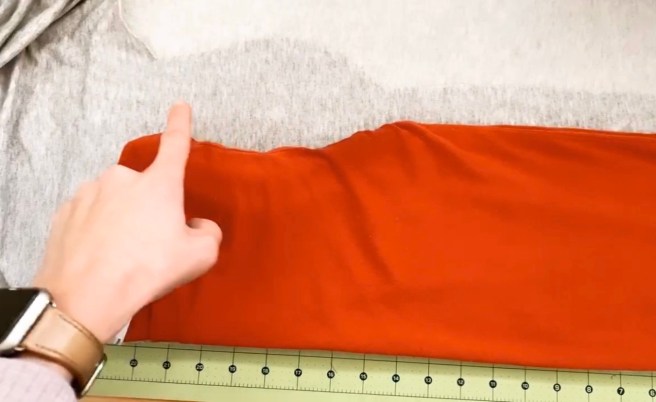
STEP 2: with my fabric folded, I will fold my shirt in half and lay it on top of my fabric, matching up the folds. I will tuck in the sleeves so that I can clearly see the line around the shoulder opening and cut around my shirt giving myself about 1/2″ seam allowance. Do this to the front and the back.
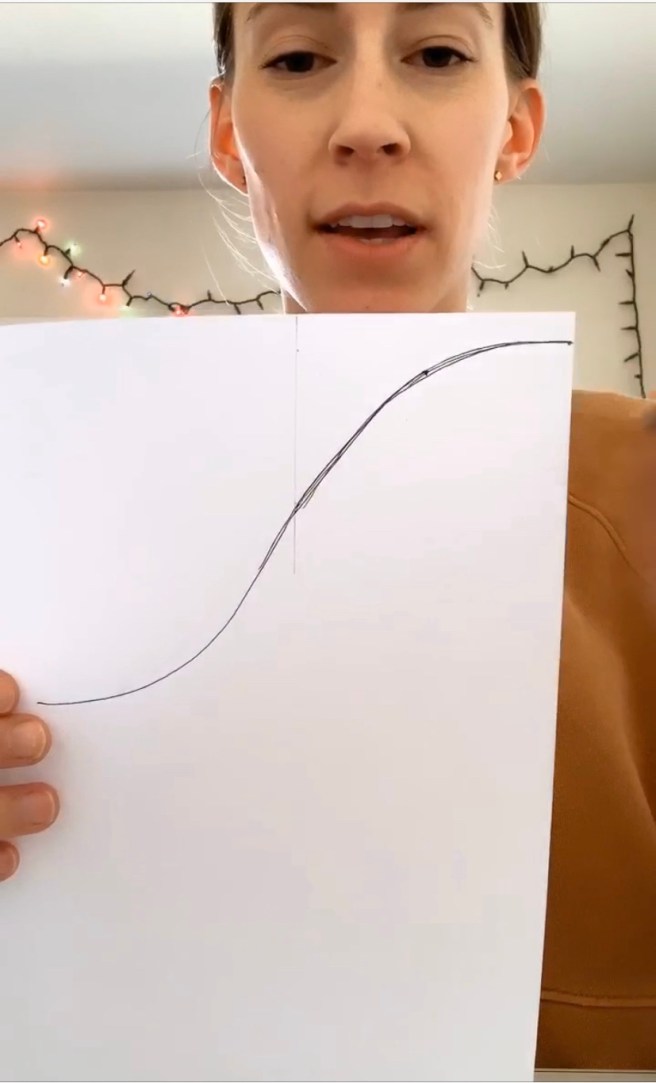
STEP 3: cutting out the sleeves can feel tricky but it’s all about math here. I’ll first measure the curve of my front and back sleeve openings. Add those two measurements and subtract 1/2″. Now I’ll sketch the sleeve top, which looks like a bell shape. This curve measurement will match the measurement of the sleeve opening. (I do this part on paper so I can then take it to the fabric and cut it out) Then I’ll cut this curve on my fabric. Just to recap:
front sleeve opening + back sleeve opening – 1/2″ = curve of the bell shape pattern measurement
Now I’ll line up my ruler with the point where the bell shape ends and cut it straight down the side, parallel to the fold, ending where I want my sleeve to end and the cuff to begin.
STEP 4: I measure my wrists and figure how wide and tall I want that cuff to be. I’ll cut that out making sure to double the height and add seam allowance so that it can fold in half. The cuff will be two layers of fabric.
STEP 5: time to sew in this order:
shoulder seams
attach sleeves
sew up sides of body and sleeves
sew wrist cuffs first up the width, then folding it into a cuff right sides out I’ll slide it into the sleeve (wrong side out) and pin the sleeve to the cuff. I should be pinning three layers of fabric together here. sew around.
hem bottom of shirt.
STEP 6: Neckline. When sewing with stretch knits the band should be smaller than the actual neckline. If it’s the same size it will not lay flat, it will stick out or up or whatever and look really really bad. I’ve made this mistake many times. Here is the fix: Measure your neckline and cut the band at 85% of that measurement. Add 1/2″ for seam allowance on the width. And the height to whatever you want it to be. (I cut my’n 2 inches here so folded in half and sewn it came to 3/4″.)
Neckline measurement x 0.85 = band length.
Sew the band together width-wise, and then fold in half height-wise right sides out. Mark the four quarters with pins and quarter the neckline as well and mark with pins. Slide the band inside the neckline (wrong side out) and match up the pins. When sewing the band I stretch the band to fit the neckline in between each of the four pins.
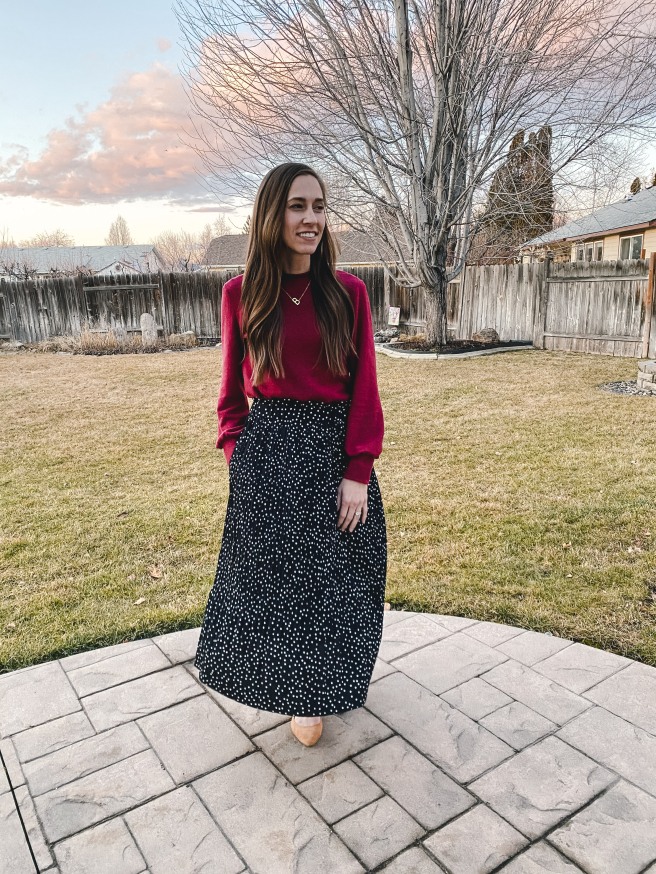
Loving these baggy sleeves
I’ll definitely be making this again or versions of it. How cute would it be in a woven fabric or with a puff sleeve and a mock neck? So many options. Please let me know if you have any questions on this make and follow me on Instagram for the video. 🙂 I appreciate you being here.
2020 can you believe it? In 2019 (and the better part of 2018), my goals and hobbies kind of went off the rails. New baby/busy kids/survival mode you know. My baby is now one, and he slept through the night last night for maybe the third time ever so I’m feeling all kinds of goal-oriented today. Yep. These will definitely last all year without a glitch.
I decided my 2020 crafty goal is to make/design one new project a month and mend one project a month. Because, real life, my mend/reuse pile is MASSIVE and ever-growing.
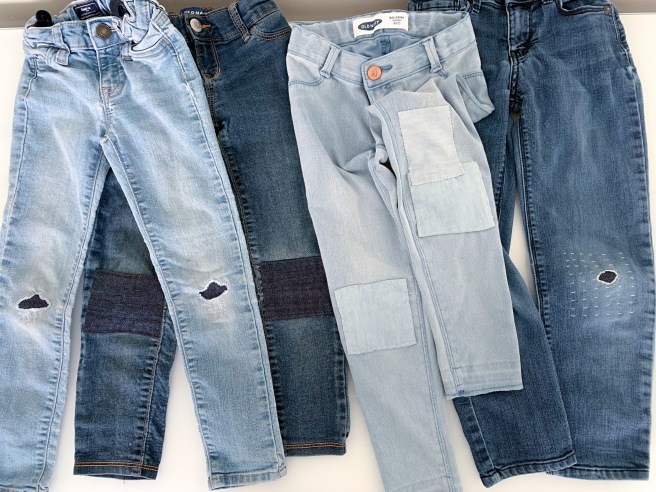
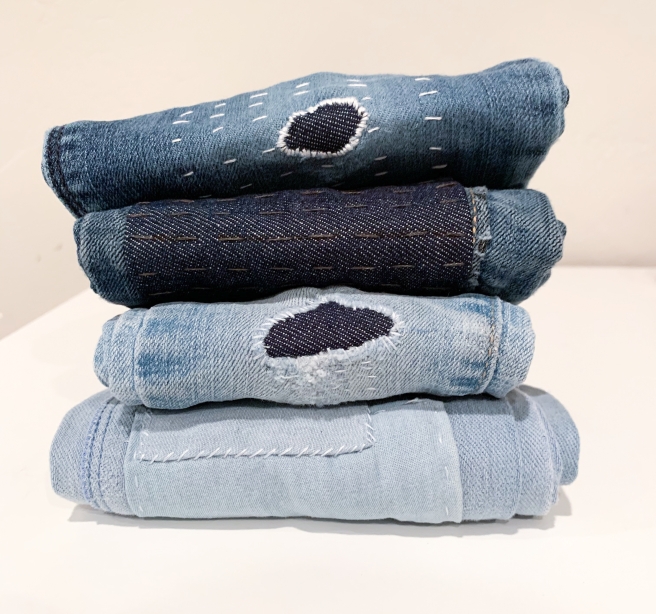
Today I’m checking off my hypothetical mend checkbox for January because I tackled the project that’s been staring me in the face for months – my daughter’s jean pile. That pile had reached at least seven pairs. So I cut up the ones she had outgrown (yep its been sitting that long) and used them for patches.
I’ve been searching for the “perfect” way to mend jeans for months on end and I think I finally found it in Katrina Rodabaugh and all her visible mending enthusiasm and wisdom. She even has a beautiful book about mending and teaches classes. I haven’t yet, but I will buy her book because it’s absolutely gorgeous and I need it on my shelf along with all her knowledge. Go check her out! Her web page and IG feed are lovely.
But today I decided to wing it for my first try and see how it went.
I used:
a size 20 embroidery needle and a small regular sewing needle for a stubborn fabric that didn’t like the big one.
two strands of DMC embroidery thread
jean patches from denim scrap fabric and extra pairs of jeans
Update: Use a thin iron on interfacing on the wrong side of the pants. The thread will rip new holes without reinforcement.
Step one was to cut squares and rectangles from my scrap denim that would cover the holes by about 1.5 inches on all sides.
For the outward patches, I then ironed in a half-inch on all sides of my jean scraps. With my jeans laying out flat, I carefully pinned the patches to the top layer. Then proceeded to stitch them on.
For the inward patches, I placed them inside cut any loose threads away from the hole and whip stitched around connecting the patch to the hole. Where there was weak threading under the hole’s location on the denim, I added some running stitches to fortify.
I used a running or whip stitch of all of these patches. I love the creativity in this! Just make it pretty. I love how they turned out and I see visible mending in my future. Maybe with some fun colored denim or DMC thread and of course endless options for stitch patterns.
What do you think? Have you tried visible mending?
Hallelujah, I finally got the mary jane shoe pattern out for testing this week. I feel like I kept hitting walls whether that looked like wrestling with the computer program or a kid spewing puke in my face (yes that happened). It’s been a crazy month and I’ve sewn what feels like hundreds of shoes checking and double checking that it’s right. I guess we will see how the testing period goes. Fingers crossed.
In honor of my new pattern, I had to pull out the first pair of shoes I ever made. Oh my goodness these are such a treasure to me. They are AWFUL. Like terrible and they make me smile every time I see them. Let’s throw this back to 2012, I was 24 and the proudest new mom.
Thanks for tuning in to my first knit along! I hope you are as obsessed with the knit bonnet trend as I am. Now if only I had a baby to go along with it. I borrowed a friend’s baby. Isn’t she the cutest?

 I hope you are all doing well at this crazy time. I’ve been thinking about you, I know it’s scary, healthwise, and financially for many. I’m trying to do my bit by staying home and checking in on my family and neighbors. But I wanted to offer something for you too! I don’t have pages of patterns but what I do have I want to offer for free. Along with it I want to sew along with you on my instagram stories so we can all do something together. Think sewing night with the girls. It’ll be great. follow me @britt.stitch on instagram for those sew alongs.

 2020 can you believe it? In 2019 (and the better part of 2018), my goals and hobbies kind of went off the rails. New baby/busy kids/survival mode you know. My baby is now one, and he slept through the night last night for maybe the third time ever so I’m feeling all kinds of goal-oriented today. Yep. These will definitely last all year without a glitch.